This window allows setting of
individual parameters and other options, and is used to control
which parameters are floated during the fitting process. To
display this window select
View, Constants...
from the main window. Values can be entered by typing, or
adjusted with the mouse.
As well as typing values in the
parameter grid interactive adjustment of parameters with the mouse
wheel is also possible. To do this, right click on the Parameter
and select "
Turn on Mouse
Adjust" (or press F3). The mouse wheel will then scale
the current parameter (shown
in
bold to indicate the wheel
adjustment is active) up or down for each click of the wheel. The
default is a scaling factor of 1.01, though if the "
Increment" field is set
for a parameter, this value is added or subtracted instead. To
turn off the mouse adjustment right click on the parameter and
select "
Turn off Mouse
Adjust" (or press F3). Also available is "
Abort Mouse Adjust" (or
the escape key) which turns off adjustment, and reverts the
current parameter to the value it had before starting mouse
adjustment.
Settings
 This
allows
you to edit individual settings. To edit a value click on the
cell or use the F2 key. For help on the current (highlighted)
cell hit F1.
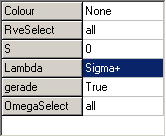
This
allows
you to edit individual settings. To edit a value click on the
cell or use the F2 key. For help on the current (highlighted)
cell hit F1.
 Windows
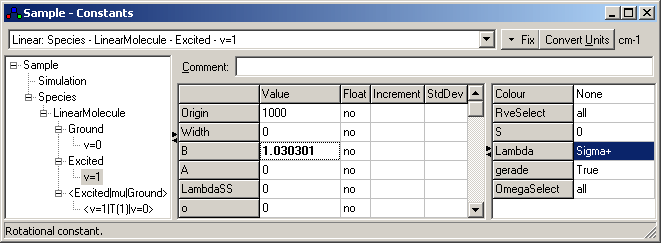


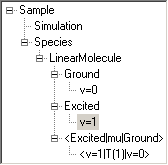 for editing. Right clicking (or
Shift+F10) on an object brings up a pop-up
menu which allows you to copy, paste delete, move and add
objects. To add objects either:
for editing. Right clicking (or
Shift+F10) on an object brings up a pop-up
menu which allows you to copy, paste delete, move and add
objects. To add objects either: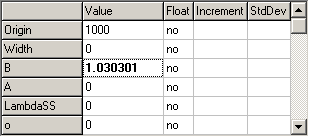 This
allows you to edit individual parameter values. To edit a value,
click on the cell or use the F2 key. For help on the current
cell hit F1. The "Increment"
column is the increment used for calculating numerical derivatives
while fitting. If left blank (the default) or 0.0001 of the initial
value is used. A value of the order of the standard deviation in the
parameter is often helpful in stabilizing an otherwise problematic
fit. The StdDev is the
standard deviation of the parameter from the most recent fit.
This
allows you to edit individual parameter values. To edit a value,
click on the cell or use the F2 key. For help on the current
cell hit F1. The "Increment"
column is the increment used for calculating numerical derivatives
while fitting. If left blank (the default) or 0.0001 of the initial
value is used. A value of the order of the standard deviation in the
parameter is often helpful in stabilizing an otherwise problematic
fit. The StdDev is the
standard deviation of the parameter from the most recent fit.